Sunday 27 September 2020

Avoiding censorship while web scraping : Testing , Buying and Setting up web proxies on AWS EC2 ft. proxy6.net PART 2


Now this post discusses about how to set up proxy on your AWS EC2.

First, if you are completely new to EC2 and want to learn how to set up and connect to EC2, I would highly recommend this video. AWS provide a free micro instance for 1 year so go ahead and try it.:


Now I assume you have set up your EC2 and connected with that using putty.


Know your current public IP:

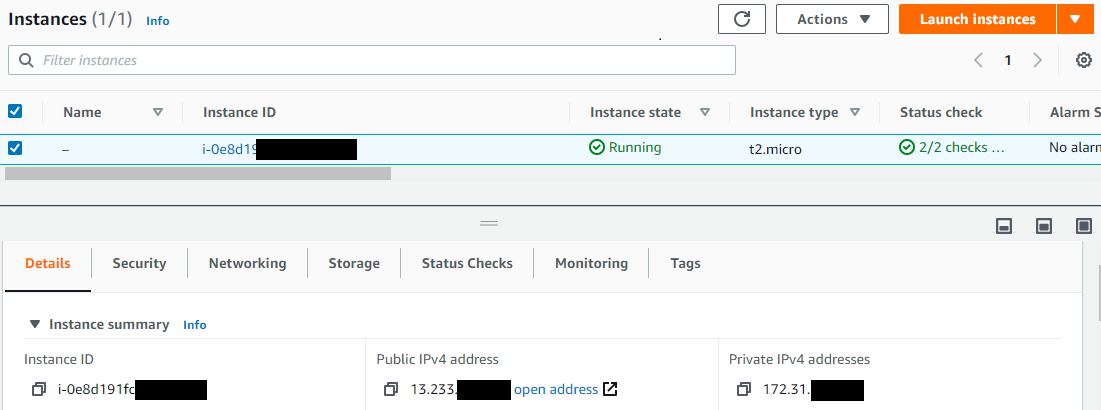
Now to know your public IP you can log in to your AWS console < https://aws.amazon.com/console/  > and check that:
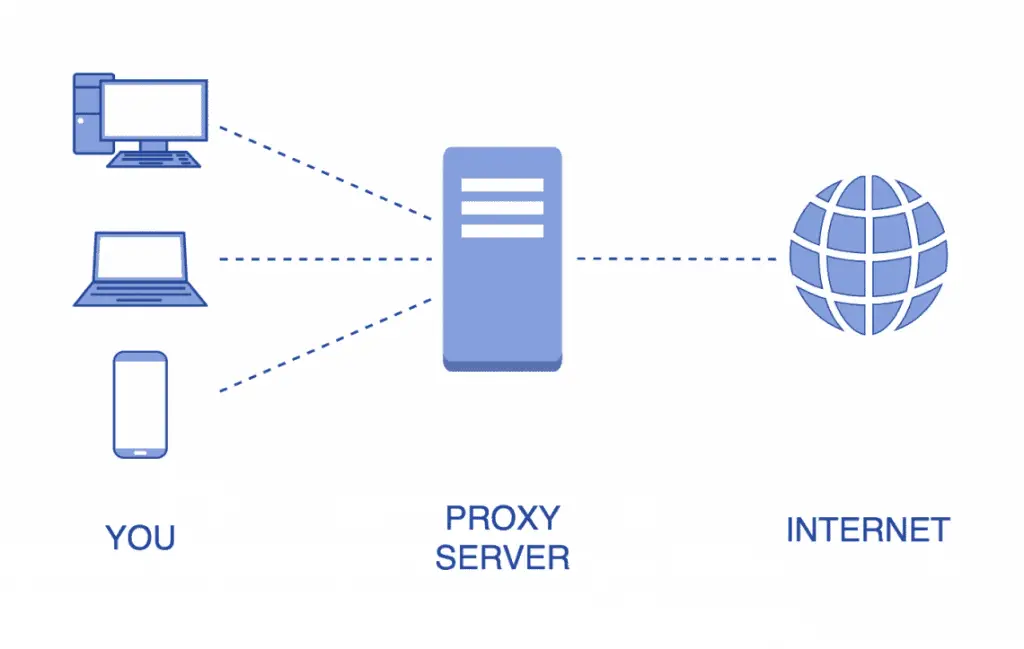


1. We are more interested on how outer world sees us. So, let’s check this on our AWS instance. Type this on your AWS:

>>> curl checkip.dyndns.org

This would return something like:

<html><head><title>Current IP Check</title></head><body>Current IP Address: 245.                                                                                        902.34.171</body></html>

 When there is no proxy this two should match.


2. At this moment if you type:  curl www.nseindia.com . you will get “blocked” message in return.

Ref :

1. https://www.shellhacks.com/linux-proxy-server-settings-set-proxy-command-line/

2. http://www.linuxandubuntu.com/home/how-to-use-proxy-on-linux-command-line#:~:text=How%20to%20set%20a%20proxy,no_proxy%3D%22localhost%2C127.0.


Now our goal is to change this IP.
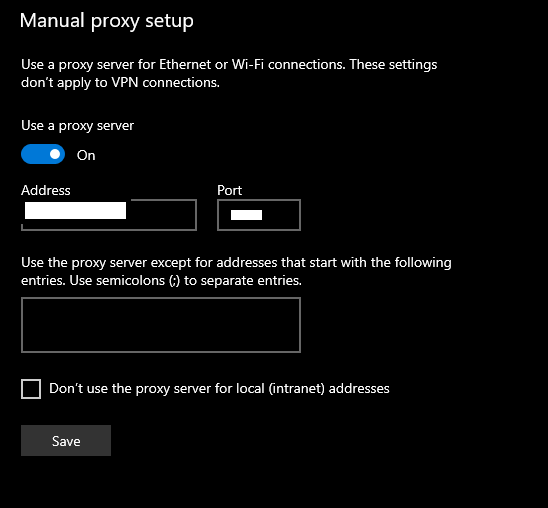
 

Setting up proxies:

1. This one is very simple you just need to change your IP , PORT , user and password in below commands and run on EC2


export http_proxy=username:password@hostIP:PORT

export https_proxy=username:password@hostIP:PORT

exprot no_proxy=localhost, 127.0.0.1, *.my.lan

example:

export http_proxy=http://DFER5:qyR7t@238.60.64.145:7700/


2. read back these variables:

env | grep -i proxy


3. see if your proxy is working or not?

Again, run the same curl command and see the return IP, it should be your proxy IP.

>>> curl checkip.dyndns.org

If you find any difficulty read above 2 reference links.


4. if you wish to check PROXY without setting up this variable, you can test using :

curl -x http://IP:PORT/ --proxy-user USER:PASSWORD -L checkip.dyndns.org


5. Now let us try to access our blocked website www.nseindia.in

Try: curl www.nseindia.com

This time it will not return earlier block message, but this will hang. And may be after long time it will return curl: (52) Empty reply from server

6. This is because we need to deliver proper headers with curl request. If you try some python modules like nsepy ( pip install nsepy ) this will work.

>> python3

Python 3.8.2 (default, Jul 16 2020, 14:00:26)

[GCC 9.3.0] on linux

Type "help", "copyright", "credits" or "license" for more information.

>>> import nsepy

>>> from datetime import date

>>> print(nsepy.get_history(symbol='SBIN',

...                     start=date(2015,1,1),

...                     end=date(2015,1,2)))


Output :


      Symbol Series  Prev Close    Open   High     Low   Last   Close    VWAP   Volume      Turnover  Trades  Deliverable Volume  %Deliverble

Date

2015-01-01   SBIN     EQ      311.85  312.45  315.0  310.70  314.0  314.00  313.67  6138488  1.925489e+14   58688             1877677       0.3059

2015-01-02   SBIN     EQ      314.00  314.35  318.3  314.35  315.6  315.25  316.80  9935094  3.147389e+14   79553             4221685       0.4249


Note : it’s better you add your /etc/environment file as well , to avoid setting this variables all the time , if you want to use proxy permanently . You can refer above 2 reference posts for that.


If you have any difficulty following this let me know. I have some topic in my mind for next post like using POSTMAN for effective web scrapping.


Avoiding censorship while web scraping : Testing , Buying and Setting up web proxies on AWS EC2 ft. proxy6.net PART 1

Ohk !!! So , you develop your amazing scrapping bot , test it on your local machine. Everything works well.

Now next logical step should be uploading it somewhere on the cloud. We chose amazon EC2 in this case. Upload it. And try to run. BAM!!!

The website that you were scrapping has blocked your EC2 public IP. Disappointment and depression hit hard.

This is a common scenario, AWS being one the most popular cloud service often get blocked by many websites. Here you can try to find some cloud provider which is not blocked, but you want your favorite cloud provider right?

I was trying to fetch few data points ( they were just 2 fetch in entire day ) using NSEpy python module , but NSE website (  https://www.nseindia.com/ ) has blocked EC2 IP.

So, let us talk about obvious solution: Setting Up Proxy.

Words like Proxy , VPN , TOR are popular when it comes to internet censorship.

So, what is Proxy?

Proxy is another computer which sits between your machine and outer internet world. So, when you access the internet, traffic goes through your proxy.

Proxy access the internet and you access the proxy. Even though you can be in India, but your proxy can be anywhere in the world.

For example let say if Tiktok is banned in India but legal in UK , so you can set up a proxy or buy a proxy which is located in UK and connect with that proxy and everything will work.

Read more about proxy here:

https://networkencyclopedia.com/proxy-server/


How to Buy a Private Proxy?

So, even though there are many public proxies i.e open public computers out there which you can use as proxy, if you are developing some decent software I would recommend to go with private proxy. This would really save your time. And later we will see how we can set this up on EC2.

In this example we will use this provider: https://proxy6.net/

They have great chat support and I have personally used them.


First, we want to test if proxy works or not.


Steps to test proxy:


1) Create account with proxy6 (sorry for referral 😊 ) :  https://proxy6.net/en/?r=240625

2) Now remember your goal: you need a proxy which is not blocked by your given website. In my case https://www.nseindia.com/.

3) Proxy6 have good chat support system, contact them on chat and ask for a TEST proxy. They will provide you a proxy for 15 minutes in your account. So, you have 15 minutes to test if it works for your purpose.


4) Now let us test this on windows. Go to your proxy setting enter your IP and PORT, turn on your proxy.


5) Now go to your browser, chrome in my case. Try to access your targeted website. It will ask your username and password. And then check the if you can access the website if yes, your proxy works well, if no you need to try different one.


Now once you verified this, you can use this proxy for your EC2, but remember you had this proxy for only 15 minutes. so, you need to renew this. Please read PART 2 for how to set this up on EC2


Saturday 19 September 2020

How to host a django web app using pythonanywhere.com ft. Zappycode


In this tutorial we are not focusing about actual django development.

But we will be using code from a udemy course to learn deployment on pythonanywhere < https://www.udemy.com/course/the-ultimate-beginners-guide-to-django-django-2-python-web-dev-website/ >

You can consider pythonanywhere , some what similar to digital ocean , AWS or Heroku . But the deployment is very very easy. Try this tutorial and you will figure it out.


Download code from here and unzip :

< https://github.com/zappycode/wordcount-project >


1) Go to “web” in dashboard -> Add a new web app .

    As we are using free account our app will be at < pandyaelectronics.pythonanywhere.com >

   With paid account you can add your own custom domain name as well.


2) then select Django , and then Python 3.6 (Django 2.2.7).


3) now it will ask for project name, be careful about project name as this will decide directory structure.

In our case use: “wordcount”.


See our local project directory we need to create same directory structure.


4) In you go to directory of  “Source code” in pythonanywhere then you will be able to see current structure of our webapp. This is like a new Django app. Even you can go to < pandyaelectronics.pythonanywhere.com > at this moment and see default Django landing page.


5) Now we don’t need to modify manage.py , as they are same.


6) Create “templates” directory and upload your template files inside that directory.


7) let media and static folders remain as it is.


8) modify following part in settings.py :

 replace :

'DIRS': [],

with :

 'DIRS': [os.path.join(BASE_DIR, 'templates')],


9) Replace “urls.py” and upload “views.py”

10) Reload the website.


11) go to url < pandyaelectronics.pythonanywhere.com > and it should work.


I hope you liked this tutorial , let me know your inputs in comments.

MongoDB change stream tutorial in Python


In this tutorial we will be focusing On MongoDB Change Streams.

Change streams basically provides you a hook to data base, so that you can get notified when there is any modification in data base ( any CRUD operations ). It acts as a trigger and it can be very handy if you don’t want to use any message queues.


There are already some excellent tutorials available around this topic, but intention of this tutorial is to provide some practical code example in python ( which I had hard time finding one ), that will help you getting started fast.

I would recommend you go to through these references first:

https://developer.mongodb.com/quickstart/python-change-streams

https://severalnines.com/database-blog/real-time-data-streaming-mongodb-change-streams

https://api.mongodb.com/python/current/api/pymongo/change_stream.html


So, what are the prerequisites to start using Change stream:

1)      You must have your MongoDB instance running in background. During windows installation MongoDB is added as a startup task. So, it will start when you start your machine. In Linux also you can add MongoDB on Startup. You can verify this by going to task manager in windows.


2)     Then you need to create a replica set. Note that change streams work on replica set.


Replica set is exact copy of your database running on another remote machine or your own local machine. We use replica set to improve performance of our overall system.


You can read more about replica set on official mongodb website. Refer Appendix section in this post to create and initiate a local replica set:

https://developer.mongodb.com/quickstart/python-change-streams

Here, we will create a local replica set so do not worry about remote machine and all.


3)      To avoid initiating replica set every time we start our data base, let’s edit data base configuration file :

Data base config file is present at: < C:\Program Files\MongoDB\Server\4.2\bin\mongod.cfg >

Open this file edit following field and save:


#replication:

replication:

  replSetName: "rs"


4)      Now you are all set, you can restart the machine, and do not need to worry about any database configurations.


Change Stream example code:

We are going to use “pymongo” module for this , so if you have not installed then

 >> pip install pymongo

1)      Now first we need a database and collection to get started , remember in mongoDB, database is not created until you put some collection and fields inside that. Create a file named “load_demo_database.py” and copy following code and run this file :


>>> python load_demo_database.py


import pymongo


myclient = pymongo.MongoClient("mongodb://localhost:27017/")

mydb = myclient["test_database"]

mycol = mydb["test_collection"]


mydict = { "first_name": "Parth", "last_name": "Pandya" , "present_days" : 0 }

x = mycol.insert_one(mydict)


print("create database successful")


2)      We have created our database; Now let’s start a change stream.

Create a file named “change_stream_monitor_thread.py” copy following code , and run this file :

>>> python change_stream_monitor_thread.py


import pymongo

import threading


def scan_user_db_changes( change_stream ):


    global mycol


    print(str(change_stream))


    for change in change_stream:

        if change["operationType"] == "update":

           updatedFields = change["updateDescription"]['updatedFields']


           for field in updatedFields:           

               if field == "present_days":

                   print("updated value of present days: " + str(updatedFields["present_days"]) + "\n")


myclient = pymongo.MongoClient("mongodb://localhost:27017/")

mydb = myclient["test_database"]

mycol = mydb["test_collection"]                      


user_change_stream = mycol.watch()

threading.Thread( target = scan_user_db_changes, \

                  args = ( user_change_stream, ) ,\

                  daemon = True ).start()


print(“waiting for updates … “)

while True:

    pass


here, you can see first we are creating a “daemon” thread. A “daemon” thread ends when all other threads end, so we cannot allow our main thread to end that’s why we have kept a “while True” loop at the end.

So, this thread will be running. Keep this console window open.

3)     Now we need to update some value in data base, so that we can get notifications. Let us create one more file and name it “database_updater.py” and run this file:

>>> python database_updater.py

This file will update “count” values every 5 seconds:

import pymongo

import time as sleep

myclient = pymongo.MongoClient("mongodb://localhost:27017/")

mydb = myclient["test_database"]

mycol = mydb["test_collection"]


for count in range(1,5):

    print("updating present days " + str(count) )

    mycol.update_one( {"first_name" : "Parth" }, \

                     { "$set" : { "present_days" : count } } )

    sleep.sleep(5)


Keep both windows open in parallel, you will be able to see update notification in “change stream” window.


Hope you liked this tutorial, do let me know if you have any feedback.